Friday, March 13, 2015

**Getting Crafty**

I usually get quite crafty in the months of January and February.  This time of the year is usually nasty outside, so I spend more time inside at home and it's the time of year I go to my annual scrapbook retreat and I get quite a bit of scrapbooking done there.

I usually put together a little goodie bag for my fellow retreat goers and this year, I made almond scented bath salts that I put in little glass bottles that I'd been saving when drinking the Starbucks Iced Coffees.  After using Goof-Off to get all of the labeling off the bottles,  I ran them through the dishwasher to get them good and clean.

Mixing up the bath salts is next and it's super easy....Epson salts, baking soda, fragrance and food coloring.  Since I decided I didn't want to paint the caps of the bottles, I went with blue food coloring so the salts would match.  After mixing the bath salts up and filling up the bottles, I got out the following from my craft stash:
  • My stash of Prima flowers
  • One of my round punches
  • Bling
  • Zig 2 way glue
  • Glue Dots
  • Ribbon or fiber (I chose some pretty blue fiber I've had for years)

After I punched out enough circles to cover the lids of the bottles, I used both glue dots and Zig 2 way glue to glue the Primas flowers on the circle and then top each on off with a touch of bling.

  
Using glue dots I covered the lids of the bottles with the flowers. 

 
I also hand lettered some tags to label the bottles "Almond Bath Salts" and tied the tags on the bottles with the blue fiber I had in my huge basket of fiber and ribbon. 

 
I think they looked very pretty!
 
  
I've also been kicking it with my scrapbook pages I'm completed.  I like to keep track.  I don't set a goal for myself because I don't want to put any pressure on working on things just to hit a page total goal, but I do like to know how many I do each year.   
 
Here's some statistics on my scrapbooking that I've keep track of for almost 10 years:
  • 2005 - I completed 137 pages
  • 2006 - I completed 144 pages
  • 2007 - I completed 144 pages (strange that I did EXACTLY the same number as the year before)
  • 2008 - I completed 147 pages
  • 2009 - I completed 107 pages
  • 2010 - I completed 112 pages
  • 2011 - I completed 80 pages
  • 2012 - I completed 74 pages
  • 2013 - I completed 61 pages
  • 2014 - I completed 43 pages
So it appears that starting in 2011, I slowed down my scrapbooking which makes sense because I don't think I was taking as many pictures as the kid was growing up and less opportunity. 
 
Here's a sampling of some of my favorite pages I've done over the last few months.   I'm a year behind with my scrapbooking, but being "behind" never bothered me because I never want to run out of things to scrapbook.


Have a great weekend!  It's been incredibly beautiful weather wise here and I've been trying to get outside after a very long two months of icky weather!


Tuesday, March 3, 2015

Just Sharing....

I've had to go out to one of our shopping malls a couple of times since the first of the year(something that I rarely do....I'd rather shop online) so because I was there, I do like to stop in to some of my favorite stores I don't get to very often.

I stopped in at LUSH while I was there and came out with a couple of bubble bars and a jar of this awesome lip scrub.....


I don't know about you, but Iowa winters take it's toll on my lips and they get chapped and flaky...this stuff is amazing and the best part.....if completely safe to ingest so after rubbing it all over your lips, you can lick off the excess....win/win!

I also had to stop in at the Brighton store.  I needed to exchange a pair of sunglasses I received from my wonderful husband as a gift and I had also had some gift money to spend so I bought myself a new key chain that I adored from the moment I saw it hanging there.  It's perfect.  :)


And no trip to the mall for me would be complete without a browsing session at Sephora and this time I only came out of there with this amazing beautyblender.  I've tried makeup wedges, rounds, a foundation brush but I love this foundation tool the best for me to use.


Back at home I've been enjoying a few things.......for the last couple of years, my favorite magazine and one I'm so excited about seeing in my mail is HGTV Magazine.  I've yet to throw a single issue away and I have the stack of them in my craft room to go through again and tear sheets for my project files.....if you haven't checked it out yet, you should.


Another fun thing I've been enjoying is my Bose Sound link Bluetooth Speaker that my husband bought me for Christmas.  I love the portability and it certainly changes up things when I'm having to clean bathrooms or paint rooms and best of all when I'm playing in my craft room.  I had to have the blue.


I've also been cooking more and I have to laugh a little because one of my favorite kitchen things to use (besides our Le Creuset and our 5 burner range) is an item that I found at a garage sale a few years ago I paid 50 cents for but because of it's size, it seems to cook in handy for many things.  It's vintage Corning ware Blue Cornflower and I'm sure there was a glass lid for it prior to me finding it, but it's works for us just the way it is.


Before I end this post I also wanted to share with you a new piece of cat art I bought myself with Christmas money.  I loved the 3-dimensional look of it, the textured mixed media and the whimsy.  I found it at an art fair, it was very reasonably priced and I had a perfect spot for it in my craft room.


Later.....and just remember....only 18 days til Spring!

Tuesday, February 24, 2015

~* Food Glorious Food *~

I've been wanting to share a few recipes with you that I've made for my family since the holidays and this blog post is about two of them.  One is an older recipe I created and we love and the other is a brand new recipe that we discovered but tweaked and it ROCKED!

The first recipe is one I've been making and improving for years.  I call it "Baked Chicken Mozzarella"

Baked Chicken Mozzarella

4 - Boneless Skinless Chicken Breasts
4 - Mozzarella String Cheese
1/4 cup of Pesto (homemade or store bought - for this recipe I used Trader Joe's)
1/2 cup of Bread Crumbs
Italian Seasoning (I use a local spice store's seasoning)
Cooking Spray
1 cup of your favorite Marinara sauce

Look easy doesn't it?  That's because it is!


^^^The chicken breasts I had were SO big that I was able to cut them into four portions shown below.
 

Here's where you get to pound out some aggression.  Between sheets of wax paper, pound the breast out to about 1/2" thickness. 
 
.
Once you have the breasts pounded out to the right thickness, give them all a nice coating of the pesto.  Place a piece of the string cheese on the chicken breast and roll the breast around the cheese using toothpicks to secure it.

 
Here's the Italian seasoning I use from Allspice a local spice store in the East Village area of Des Moines.  Best spices and seasonings ever!


Once you have your chicken breast rolled up and secured with toothpicks, dredge them in the bread crumbs as best you can around the picks.  I like using my seasoning mixed with the bread crumbs and then sprinkle a bit more once I have the breast covered.  


 Place the breast in a baking dish that has been lightly sprayed with cooking spray.  I also spritz the breasts themselves with a bit of butter spray so they crunch up nicely in the oven.


What I can't believe I did was not get a photo of the finished product on a plate with a dollop of marinara sauce and served with crusty Italian roll and a leafy green salad with zesty Italian dressing.  I think I was too excited about digging in and eating it then I was getting that final photo.  :)
 

**********************************************************************
 
The second recipe is a remake of a recipe I saw on Facebook from a website called Six Sisters Stuff, but I changed up the ingredients enough that I call my recipe inspired by theirs.
 
 
Slow Cooker Mongolian Beef
 
1 pound of whatever steak you want to buy (sirloin, flank, flat iron) - cut into stir-fry strips
1/4 cup of cornstarch
2 Tablespoons of Olive Oil
1/2 teaspoon of minced ginger
2 gloves of garlic (I didn't have any fresh but I had jarred minced in my produce drawer so I used that)
1/2 cup of light soy sauce
1/4 cup of Tamari sauce
3/4 cup of water
1/2 cup of brown Splenda
1 pint of fresh mushrooms, sliced or quartered
3 medium green onions, sliced


Dredge the beef strips in the cornstarch, shake off excess and place in a slow cooker that has been lightly sprayed with cooking spray.


The next seven ingredients are what is needed to make the sauce to go over the beef mixture.  Dump them all in a bowl and whisk it up.  Do you have a rasp to grate things?  I love that thing, I had it for years and can't even remember when I got it....it's one of a set of two and they have held up well.


Once you have the sauce mixed up, pour it over the beef in the crock pot and let it go!   Set on high for 2-3 hours and low for 4-5. 

 
The original recipe had carrots and my spouse is not fond of cooked carrots in things, especially his stir-fry, so my recipe uses fresh mushrooms.  Since I'm using those I'm not going to add them until the final 30 minutes of so of cooking.  They don't take long to cook and I didn't want them mushy.
 
 
The results after the low slow cooking of about 3 hours was a heavenly smell and sight of ginger, soy, beef so tender it falls apart on your fork and mushrooms cooked to just the right doneness (is that a word?)  :)
 
One of favorite things in the world is sticky rice.  I adore it and it is SO carb heavy that I don't fix it very often, maybe 3-4 times a year but this recipe was begging for it, so I made sure I had the sticky rice soaking (a major part of making it......don't forget....for at least 4-6 hours).
 
Once you steam the sticky rice and no, you don't use a traditional rice steamer....won't work...you use a stainless steel pot and a bamboo hat and no, I don't have a photo right now of ours.....I bought it at a local Asian market.  I do have a photo of the bamboo serving container I have for sticky rice that I bought when I bought the pot and hat.


Here's the sticky rice!  SO good..........I can't even......


Slice up a few green onions to top the Mongolian Beef .


Enjoy!   After a couple of weeks of slug like behavior I am attempting to get some things done this week in addition to keeping up with a very demanding business class, the biggest of which is painting a guest bathroom that has never been painted in the almost 11 years we have been in this house....and for a bathroom that is rarely used, it sure was dirty....I had to clean before painting and really clean after too....I share it once I'm done......and it's the first of two I have to do.

Saturday, February 14, 2015

~*~*Spice Girl*~*~

It's been a couple of weeks since my last blog post......the end of January didn't treat me very well...I didn't feel good for about a week (can't say it was the flu though) and then I rolled my ankle while going to get the mail in the ice and snow and was laid up because of that and I didn't feel like doing anything other than diving into my pile of books.  :)

A project I did take on after the holidays was our spice cabinet and refrigerator.   After having the refrigerator stuffed with holiday food, I felt it was time to purge, clean and organize it a bit better.  Our spice cabinet probably hasn't been touched in 3-4 years and I know there were things in there that needed to be tossed.

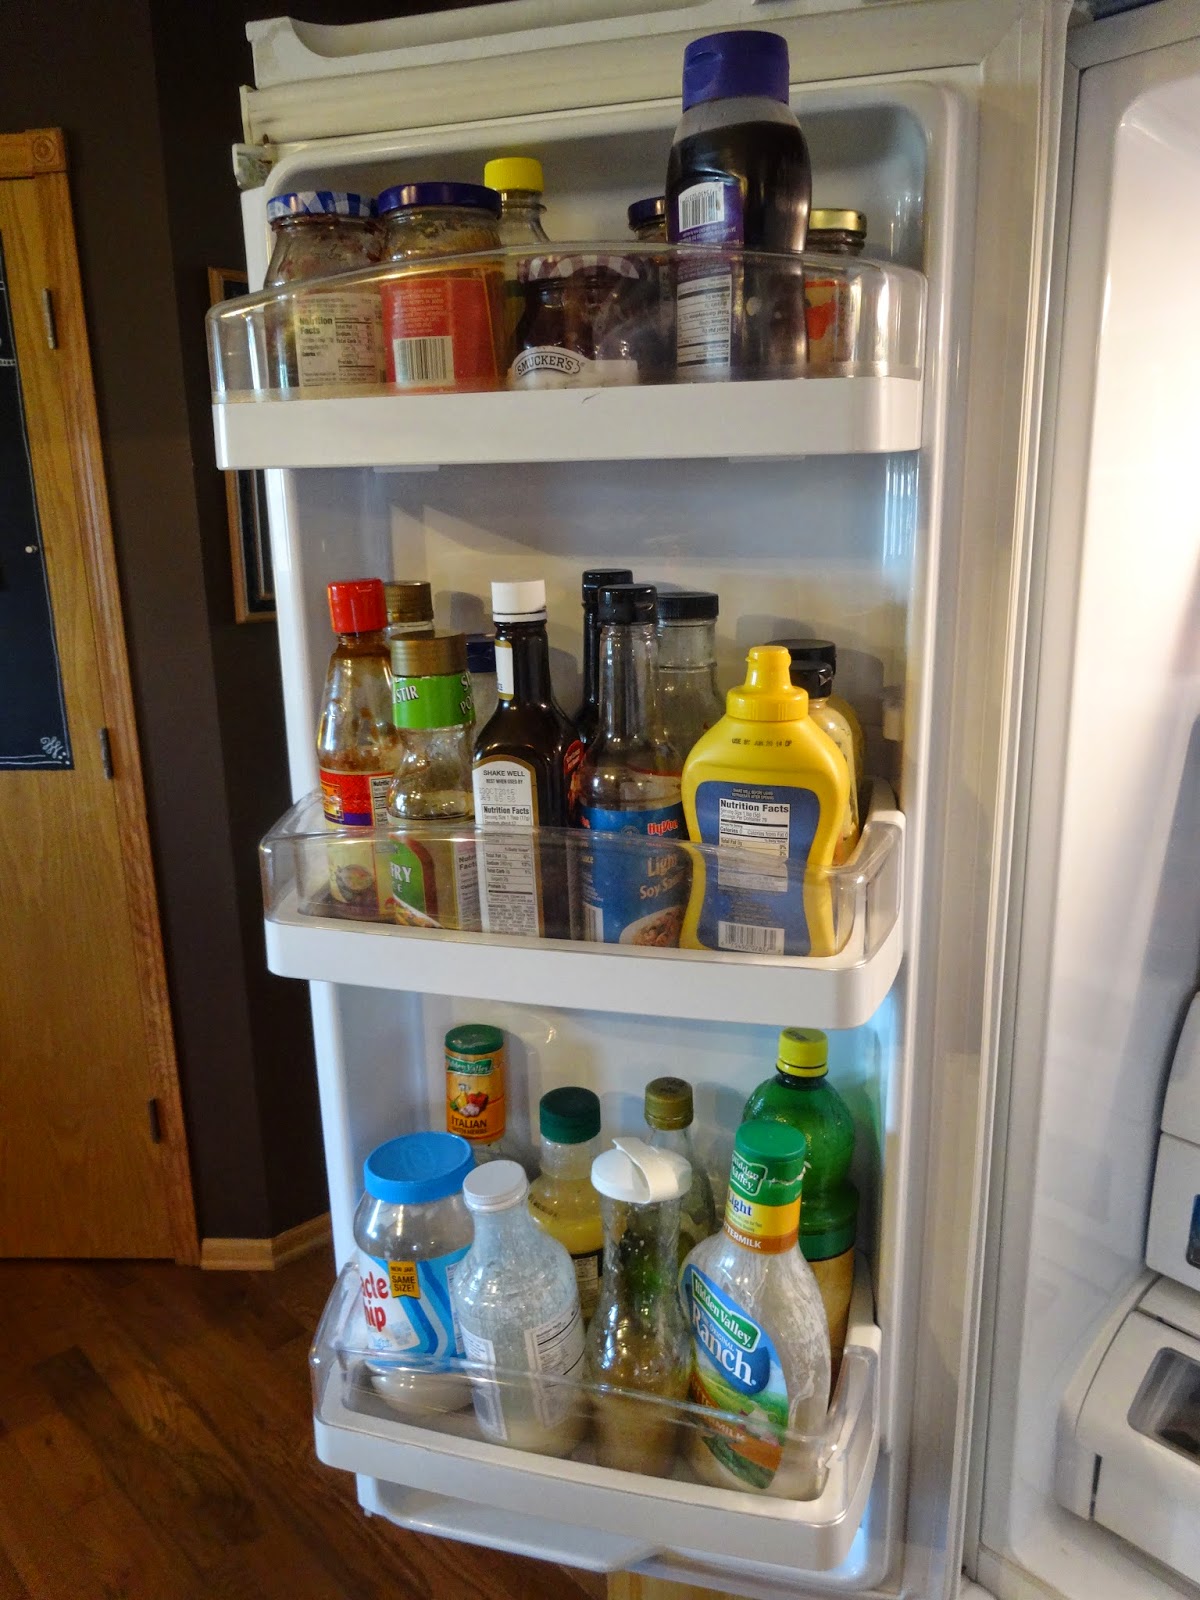
I started with the fridge.  I emptied it completely.  I couldn't believe that what we had in our fridge not only covered our island but a good part of our counter top too, then took out the mats that I have laying down on the shelves (they do help with cleaning) and while those were soaking in the sink, I wiped down the entire inside including both doors. 

This is the fridge prior to emptying it - pretty packed and in need of a cleaning.  I'm almost embarrassed to show it to you.  :)


It was also a good time to get rid of crap that was old or had been forgotten about.

Caveat!!!  This project takes WAY longer than you think it does and I had my husband's help....he was washing the various bins, removable shelves and wiping down bottles while I was cleaning the walls and insides of it.  I think all in all it was a three hour project.


Above is how it looked after the deep cleaning.  Much more manageable and easy to find things than before.  I hope we can keep it that way for at least a few months.

Our spice cabinet also needed a purging and re-organizing, so one dreary day I emptied the cabinet completely so I could purge all of the spices, herbs and seasonings that are no longer good.

This is only a tenth of a fraction of what came out of that cabinet.   It was ridiculous that we hadn't gone through some of it before now. 

After purging, I needed to re-arrange what we had.  We know what we use on a regular basis so those items should be front and center.  I saw this system at Bed Bath & Beyond and thought I would give it a try.

After sorting and purging what we had in the cabinet, I started to install the Spicy Shelf.  The way this cabinet is configured, I would not be stacking them like the illustration of the box.


As you can see from the photo above, the spices and rubs that we use a lot are all located on the bottom shelf.  I also have well used spices in a small carousel that fits perfect in the middle of the Spicy Shelf as shown in the photo below.


Baking things such as vanilla, baking powder, baking soda, cinnamon sticks, etc. are on the second shelf with our supply of salts and peppers.  On the third shelf is a round carousel that holds bottles of various smokes and sesame oils, hot sauces that need no refridgeration.


I also turned the back side of the cabinet door into a place to hang all of our measuring cups and measuring spoons.

 
I found chalkboard vinyl on Amazon and cut it to size to fit the door.  I love that it's removable.

 
I also bought 3M Command hangers that I painted black to blend with the chalkboard surface.


One of the first things I did to the chalkboard vinyl was figure out how I was going to layout my cups and spoons and measurements I wanted to print on the cabinet.

 
Using a chalk marker I wrote the measuring equivalents and some decorative borders.


Decided to give the front of the door a bit of pizazz too!


Thanks for stopping by and letting me share another couple of my projects!  As you can see, I definitely stay busy in my retirement.