Thursday, June 4, 2015

~**Let's Talk Bathrooms Part 2**~

Since I'm finally starting on our master bathroom update, I thought I'd share the guest bathroom that I painted a couple of months ago.  It was still the same Sherwin Williams "Dover White" that the contractor had painted the entire house in eleven years ago.  It wasn't horrible, but it was time for a fresh coat of paint.  This bathroom is only used when we have house guests.  It's has a doorway into the guest bedroom and another doorway into the upstairs hallway.

 
As you can see it's a pretty basic bathroom.........


Here's the bathroom in a mid painting state.


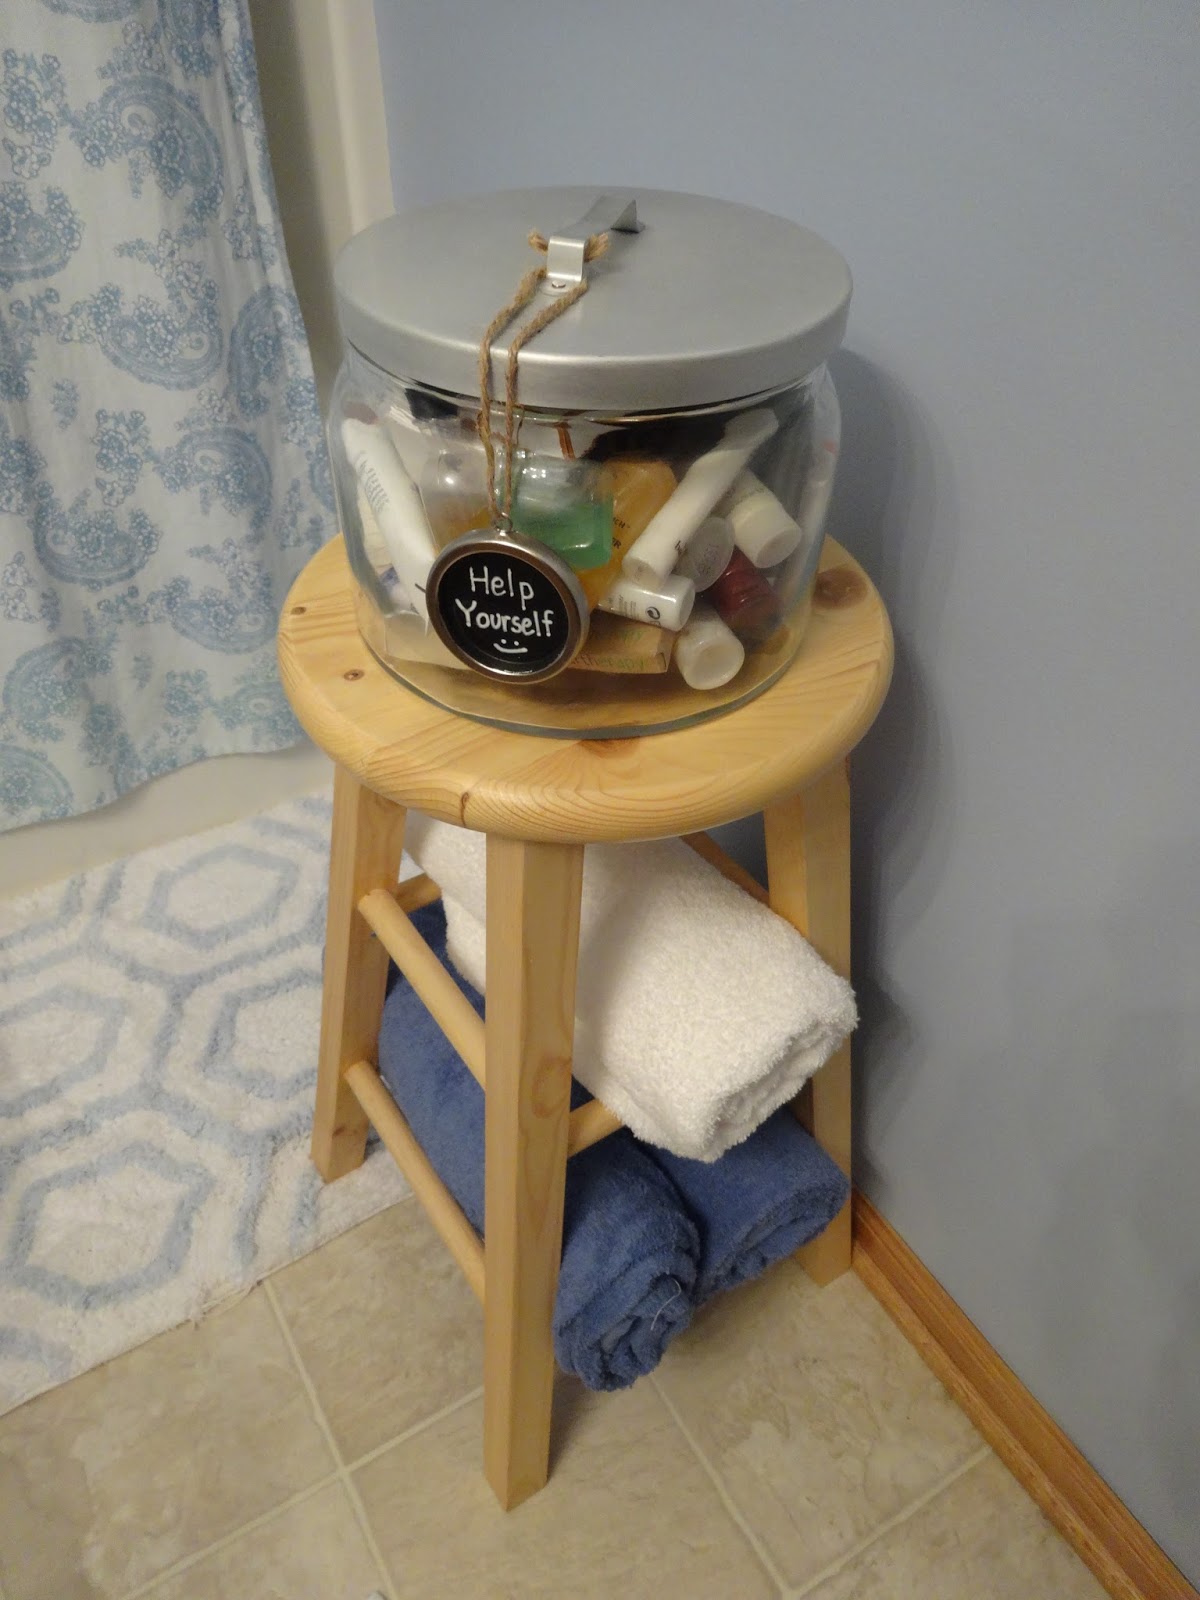
I did want a fun way to offer up various toiletries that I have collected in my many travels and are perfect for guests to use.   I didn't have a lot of room and I was keeping all the toiletry samples in this IKEA glass jar, so whatever I decide to use has to be able to hold the jar.

I came across this wooden bar stool that looked to work perfect for what I had in mind. 


So, after my husband assembled it for me, I put the jar of toiletries on top and rolled up some extra towels and used the rungs of the stool to store those. 


I had some cute chalkboard tags that I found at the Target Dollar Spot, so I used one of them for cute way of letting my guests know they can use what they want.  :)

I was thinking about framing out the mirror and getting a new light fixture, but figured that could wait.  I have the master bathroom to think about.  I can come back and do that later.


To save a little money and because I like to repurpose things, I switched the relatively new shower curtain from our master bathroom to this bathroom.  I think it matched the Sherwin Williams "Blissful Blue" pretty well and it's such a pretty blue.


Thanks for stopping by and taking a peek at another project that I fill my retirement time with.


Wednesday, May 13, 2015

*Dining Alfresco - Getting our deck ready for the season*

It's that time of the year where I bring out the things we use on our deck.  Cushions, pillows, planters, lanterns, candles, etc. and once the threat of snow passed, it's time to clean up and bring the stuff from storage.

We waterproofed our deck last year and I hate what it did to it, so I'm really hoping that it wears off this year so that next year, we'll do it right and with a better product.

I bring out the deck rug, cushion to my lounge chair & my deck poof as soon as I can but it's far from finished.

 
We keep our gas grill out on the deck year round and have been know to shovel a path through the snow in the winter to use it.  Those three container pots in corner are going to hold herbs soon.
 
I have a wire rack that I use out there and because it stays out there over winter, I usually have to touch it up with a few squirts of spray paint every year......this year was no exception.  I store a tote full of things that I like to display on that rack along with containers I plant with flowers that go on it.

This year I decided that I wanted to do something to the shelves of the wire rack besides touching it up with spray paint.  Since the shelves were wire, some thing were hard to stand up on them and I thought it could use some more weight.

I came up with the brilliant idea of thick wood pieces to act as shelves on top of the wire shelves.  So off to Lowe's I went and I came back with exactly what I was envisioning.   I found a 2 inch thick board that was 8 foot long, had Lowe's cut it to the dimensions I needed and I hauled the pieces home.

Here is one of the boards unfinished and one of them after I stained it using Minwax's Mission Oak.  It's a product that is both a stain & polyurethane.


After I was done staining, I also sprayed them with some Thompson Water Seal since they'll be outside.
 
 
I let the boards dry for several days before I went forward with the project.  In the meantime, I re-spray painted the wire rack and let it dry.
 

Once everything was dry and with the help of our son, I was able to move the wire rack back out to the deck and set the boards on the shelves of the wire rack.

 
Here's the rack filled with the planters and garden things I love.  There is a scented geranium planted in the owl planter and you can catch whiffs of it when you walk by.
 
 
This year I decided to dedicate this corner of our deck to mostly herbs with a container of petunias thrown in.  I've got chives (they survived the winter in the pot and started growing again), dill, basil, flat leaf parsley, thyme and mint growing here.  They do pretty good....lots of morning and early afternoon sun, but get a break from it in the evening.


New this years is my Hawkeye planter!  I had never seen these black & gold petunias until I was out at Canoyer Garden Center and saw them there.  I paired them with some yellow daisies.  This isn't the best photo of the planter and I think it will look better once it fills in.  I made the Hawkeye plant post myself using a post finial, black gloss spray paint, Herky stickers and sealant.....total cost...probably around $5 bucks.
 
This is a huge dish planter that I scored at IKEA years ago and I use it for herbs also.  I have Rosemary and more Thyme planted in it this year.


A view of where I like to camp out on beautiful days.  Because the deck sits on the east side of our home, it's can almost too hot and sunny in the mornings so I have to use an umbrella when sitting out there.  After 2:00pm, the sun is over the house the it's shaded the rest of the day and evening.

 
Here's where we like to dine when the weather cooperates.  I bought new chair pillow this year in a blue, green and yellow color scheme and they are just the right thing to support your back if needed.


Of course our deck wouldn't be complete without paying homage to one of our favorite things in the world.......cats!  Found this guy (made out of salvage auto parts) at our local farmer's market years ago and he still makes me smile with I see it.


Enjoy your week!  I'm heading to Texas to see some long time friends and whoop it up a bit!

Wednesday, April 29, 2015

Back to the Land of Living - de nouveau

Wow....it's been three weeks since my last blog post and I can't say I felt any better in the past three weeks than I did in my last post.  That "left arm/elbow/hand" thing that I mentioned in my last post ended up being diagnosed as herniated disc at C6-C7.  :(   It took two urgent care visits, one neck x-ray and a cervical MRI before we figured out what it was and it hasn't been fun.

The herniation could be worse and at this point I've decided to go as conservative as I can with treatment ONLY because I actually think my arm is getting getter, little by little, day by day.  I'm dealing with it as best as I can with medication and will probably start some type of physical therapy and massage therapy soon. 

I've really been trying not to let the injury debilitate me because it's gardening season and my project list keeps growing, I just have to take frequent breaks and know what my limitations are.  2015 might not have started out well for me but I'm confident that the rest of the year will be much better.

Since my last post, we did get the cabinet that I showed you in my last post re-fitted with sliding drawers and its working out very well for us.  Fred built us one of these type of cabinets in our first home and we liked how functional it was.

Before -


I actually re-purposed that sliding wire basket on the left by installing it in another base cabinet and it works perfect for holding a basket with various kitchen gadgets.

After -

With our pots, pans, lids and wood planks -

 
When I took this picture I still hadn't put down drawer liners but you get the idea AND I can use my foot to pull out the bottom drawer.
 
*****************************************************************
 

Here's a sneak peek of part of my next project, but it's in line after the master bathroom get re-painted.


and just because.....some kitty cuteness......KirbyKat love.


Tuesday, April 7, 2015

Back to the Land of Living

Not going to sugar coat it....I've felt like crap the last couple of weeks.  Not only dealing with an elbow/arm/hand issue but the much loved young adult in the house decided to share his upper respiratory crap with me a couple of weeks ago and it kicked my butt!  My energy level has been non existent....I've had just enough energy to do my college class work, keep the house in order and cook some semblance of dinner for the family, everything else got pushed aside.

So, I've been neglectful of my blog and I'm getting to get myself back on some type of schedule, not just with my blog but with my life.  :)

I have lots of things on the horizon to manage.  My husband is leaving next week to visit his ailing mother in North Carolina and the young adult and I are staying home because of college and work (young adult).  I'm visiting some old friends next month in Houston and before I leave, I would really like to have our master bathroom re-do almost done but with my college class wrapping up and a final project due also besides the final exam before I leave, I not sure if it's possible.

As much as I want to completely rip out our master bathroom and re-do it, we can't afford to, so I'm going to just update...it's been 10 years since I painted and the floor has taken a beating also.

The re-do consists of:
  • Completely repainting bathroom
  • Framing both wall mirrors over the vanities
  • New flooring
  • New light fixtures
  • New faucets
  • and maybe painting the vanities
I'd like to get the painting done while the husband is gone and won't be using the room so that's how I'm going to approach it.....baby steps....

One thing I'm super excited about that is happening next week is the custom cabinet pull outs that I ordered for the base cabinet in our kitchen that houses our pots and pans.  I came across this local company EZ-Gliders at the Home & Garden show I went to in February and I had them come out and take a look and give me a quote.   It's not a cheap enhancement, but for us it's worth it because it's the one cabinet we are in and out of the most of all and it's not awful trying to find what you want.  We even tried a cheap wire pull out for pots and a wire coated plate rack to stand pans in but it's not working for us anymore.


I'm also contemplating tile choices right now for our fireplace surround.  It's the most ugly boring beige tile you have ever seen and it's crying for a make-over also.  :)

AND in addition to all that....I have our everything on our deck in disarray while I'm repainting and freshening up some things...too many things....how in the hell did I ever work 44 hours a week?

So....stay tuned....lots to share.....hopefully I'm over the hump with this creepy crud I have and I'm ready for spring, house projects, gardening and some outings! 


Friday, March 20, 2015

~**Let's talk bathrooms Part 1**~

Shall we?  We have 4.5 of them....yep....4.5 for three people....it seems a little overkill for us, but to be honest, two of them are rarely used.  The full bath off of my craft room is rarely used and our upstairs guest bathroom is only used when we have company.  The young adult in the house has his own full bath off his bedroom, we have our master bath and there is a 1/2 bath on the main floor for guests.

Lately I've been busy re-painting and updating two of them and I'm getting ready to start to re-do our master bath.   Our upstairs guest bathroom has never been painted and was still the Sherwin Williams Dover White the contractor had chosen and it was time to give it a fresh coat of paint and the downstairs bathroom was in desperate need of updating......what was I thinking when I did it 11 years ago? 

Here the full bath off my craft room that I did 10 years ago, but it still makes me smile, it all still looks good, it pays homage to animals and I still love it all these years later, so I'm leaving it alone.


Hanging above the toilet is one of the cross stitch samplers that my mother made me years ago and I just treasure it.  Here's a close up.......isn't it precious?  and the perfect gift for this cat loving family.

 
*************************************************************

The first bathroom I painted and decorated was the main floor 1/2 bath.  It's the bathroom most used by us and our guests and it's the smallest, so I started there......well, let me tell you, my taste has definitely changed in the 11 years since I did it....

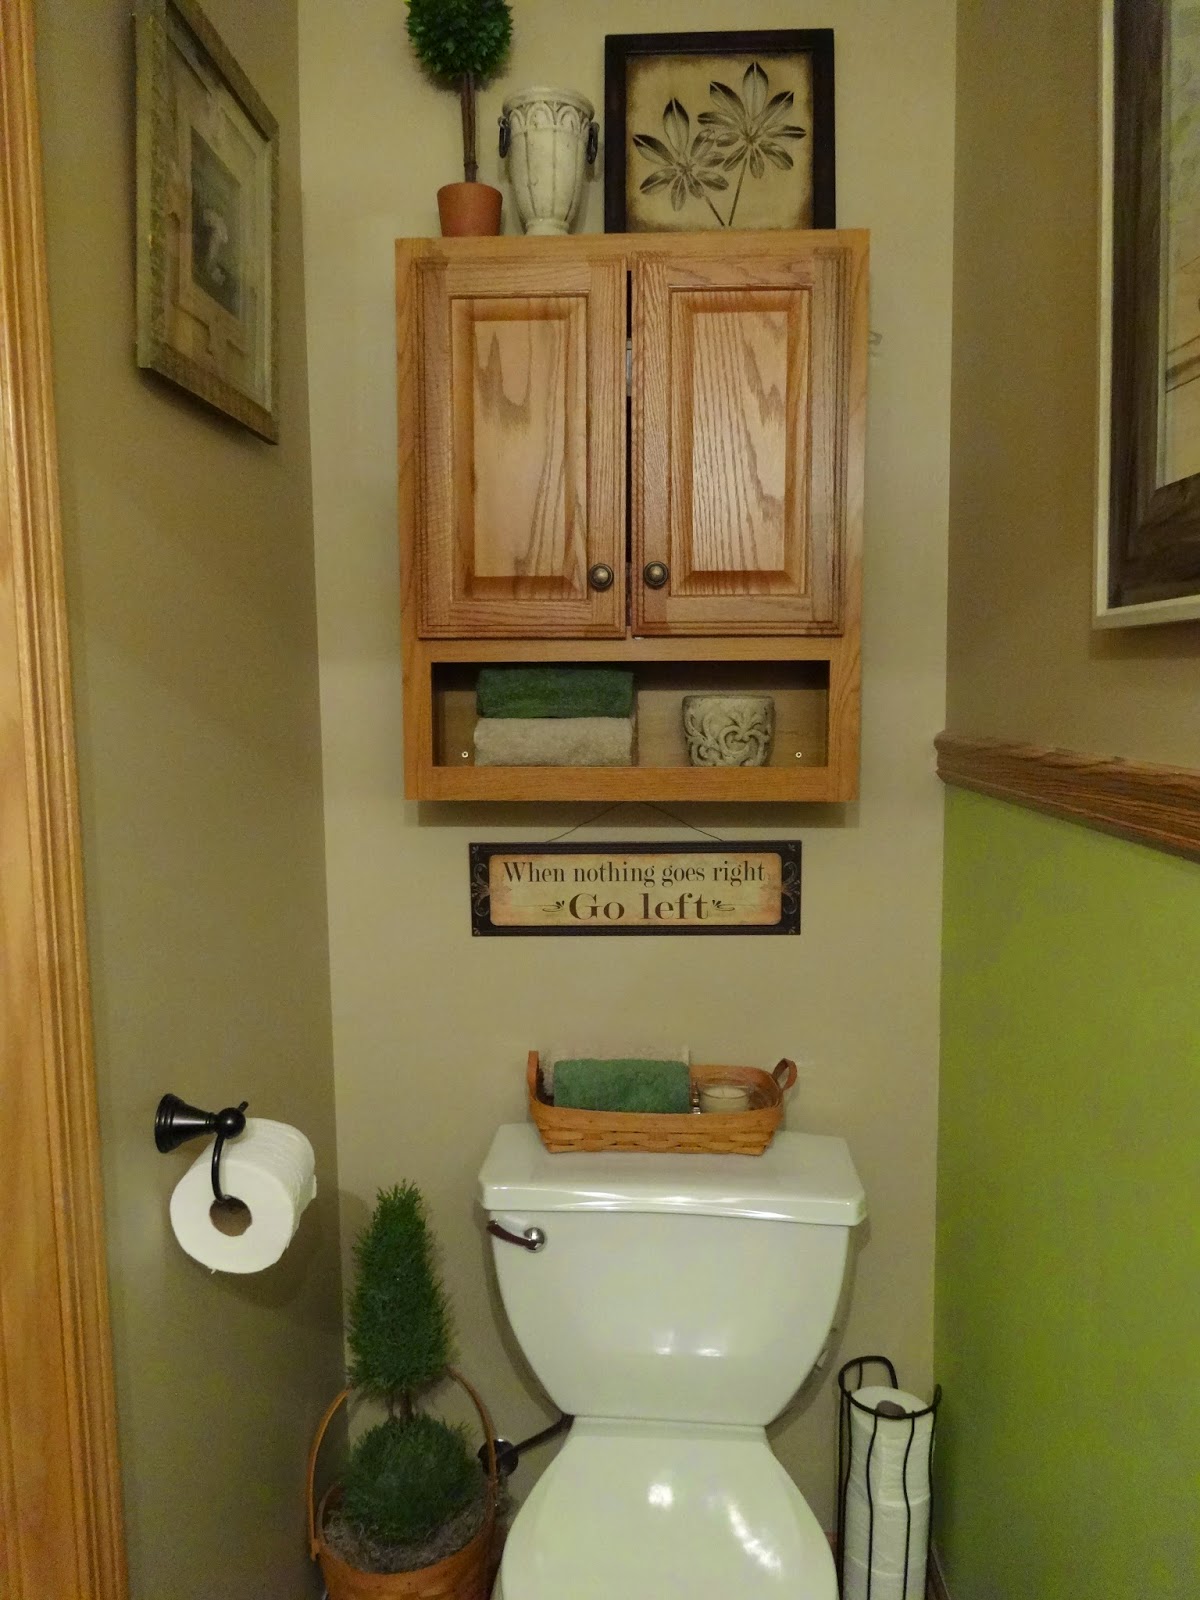
Here's a picture of the awful wallpaper we took down.  We also had a cheap over the toilet cabinet that came with us from our first house that we got rid of and mounted a wall cabinet.


I decided to leave the wood wainscoting but no more wallpaper!

I also had to do something with the awful brass fixtures that were in the room, so my handy dandy spouse switched out the faucet, towel holder and tissue paper holder to an updated oiled bronze finish and I spray painted the light fixture an oiled bronze because I didn't mind the style just the finish and I didn't really see one that grabbed me enough to spend the money on it....beside why buy, if you can repurpose?


Sherwin Williams "Beach House" is the paint I used for most of the wall color (I've also used that color in our den, foyer, hallway and staircase walls) and on the bottom part of the wainscoted wall I used Valspar's "Green Goddess".  I also applied a bronze rub-on detail to the front of the pedestal sink.
 

I found the following picture at Kirkland's and the green in the picture played well with the green that that I chose for the bottom part of the wall.


The green on the wall in this photo appears much brighter than it actually is......it looks downright hideous here.  :)

 
The metal sign above the toilet can mean many things.  :)
 
Lastly, we replaced the cheap hollow core door with a 6 panel sold wood door (which we are slowly doing throughout our house). 
 

Thanks for stopping by and letting me share one of the projects I've been working on.  As I said earlier, our upstairs guest bathroom has never been painting and I just recently finished that project and I'm gearing up to re-do our master bath that hasn't been painted in since 2005.  Both rooms are in desperate need of a fresh coat of paint.

Stay tuned and I'll share those project with you when I'm finished!

Friday, March 13, 2015

**Getting Crafty**

I usually get quite crafty in the months of January and February.  This time of the year is usually nasty outside, so I spend more time inside at home and it's the time of year I go to my annual scrapbook retreat and I get quite a bit of scrapbooking done there.

I usually put together a little goodie bag for my fellow retreat goers and this year, I made almond scented bath salts that I put in little glass bottles that I'd been saving when drinking the Starbucks Iced Coffees.  After using Goof-Off to get all of the labeling off the bottles,  I ran them through the dishwasher to get them good and clean.

Mixing up the bath salts is next and it's super easy....Epson salts, baking soda, fragrance and food coloring.  Since I decided I didn't want to paint the caps of the bottles, I went with blue food coloring so the salts would match.  After mixing the bath salts up and filling up the bottles, I got out the following from my craft stash:
  • My stash of Prima flowers
  • One of my round punches
  • Bling
  • Zig 2 way glue
  • Glue Dots
  • Ribbon or fiber (I chose some pretty blue fiber I've had for years)

After I punched out enough circles to cover the lids of the bottles, I used both glue dots and Zig 2 way glue to glue the Primas flowers on the circle and then top each on off with a touch of bling.

  
Using glue dots I covered the lids of the bottles with the flowers. 

 
I also hand lettered some tags to label the bottles "Almond Bath Salts" and tied the tags on the bottles with the blue fiber I had in my huge basket of fiber and ribbon. 

 
I think they looked very pretty!
 
  
I've also been kicking it with my scrapbook pages I'm completed.  I like to keep track.  I don't set a goal for myself because I don't want to put any pressure on working on things just to hit a page total goal, but I do like to know how many I do each year.   
 
Here's some statistics on my scrapbooking that I've keep track of for almost 10 years:
  • 2005 - I completed 137 pages
  • 2006 - I completed 144 pages
  • 2007 - I completed 144 pages (strange that I did EXACTLY the same number as the year before)
  • 2008 - I completed 147 pages
  • 2009 - I completed 107 pages
  • 2010 - I completed 112 pages
  • 2011 - I completed 80 pages
  • 2012 - I completed 74 pages
  • 2013 - I completed 61 pages
  • 2014 - I completed 43 pages
So it appears that starting in 2011, I slowed down my scrapbooking which makes sense because I don't think I was taking as many pictures as the kid was growing up and less opportunity. 
 
Here's a sampling of some of my favorite pages I've done over the last few months.   I'm a year behind with my scrapbooking, but being "behind" never bothered me because I never want to run out of things to scrapbook.


Have a great weekend!  It's been incredibly beautiful weather wise here and I've been trying to get outside after a very long two months of icky weather!